How to Solve a Rubik's Cube Without Memorizing Algorithms: Even a Kid Can Understand
Perhaps you’re a complete beginner to the Rubik’s Cube, someone who’s never quite managed to solve one.
Most tutorials out there simply throw a bunch of strange algorithms at you, telling you to do this, then that, and voilà, the cube is solved. But you’re left with no real understanding of why it works.
This article is here to save the day. You’re about to learn, from the ground up, how to solve a Rubik’s Cube without memorizing a single algorithm. We’ll delve into the cube’s origins, understand its mechanics, and then I’ll guide you step-by-step, from theory to practice, through a complete solve, teaching you to truly see the cube.
This might just be the first time you successfully solve a complete Rubik’s Cube with your own hands.
The Birth of the Rubik’s Cube
What gives the Rubik’s Cube such enduring appeal? Let’s start by exploring its fascinating origin.
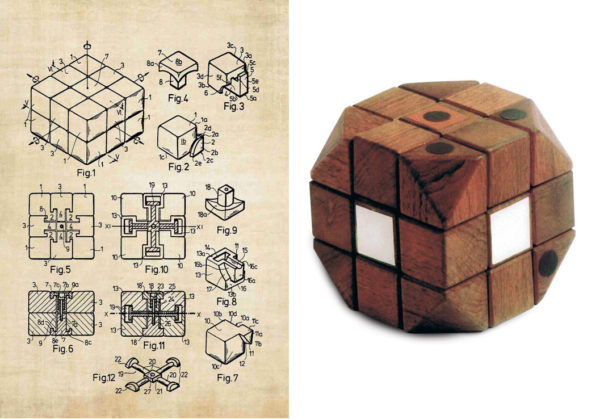
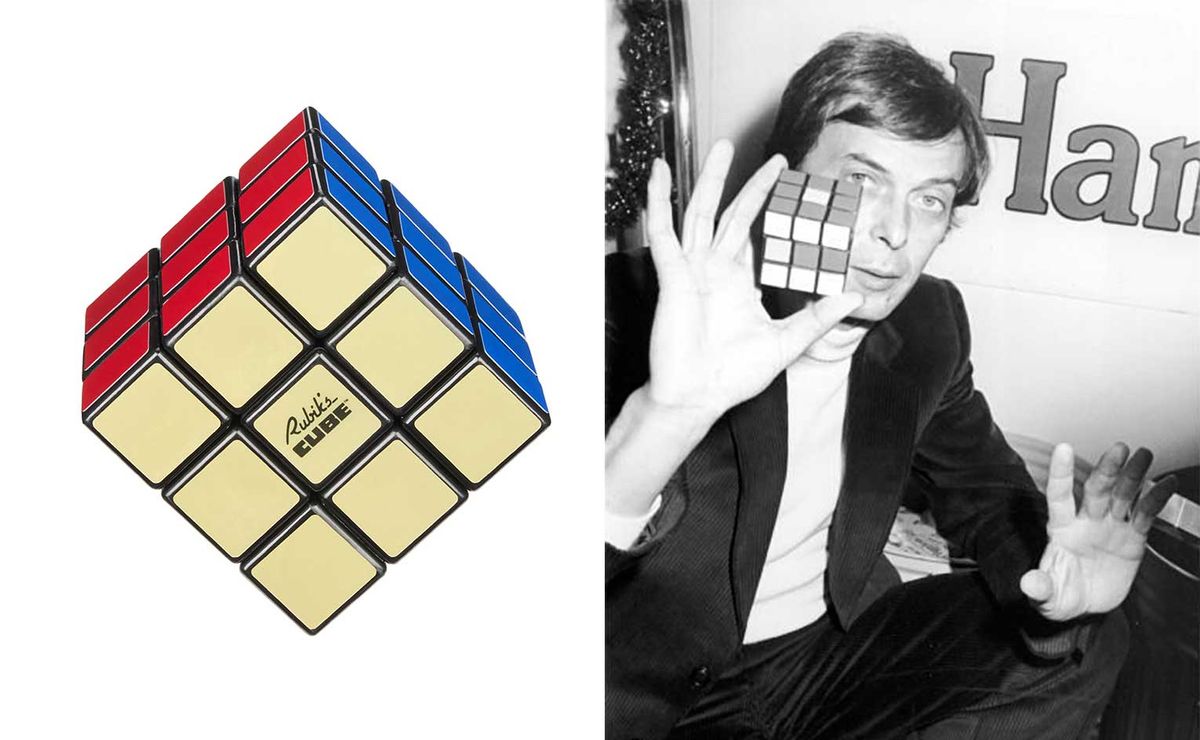
In 1974, Ernő Rubik, a Hungarian architecture professor, created the first prototype out of wood. His goal was to demonstrate to his students how individual parts could move independently without disrupting the overall structure. He painted each of the six faces a different color, and just like that, the Rubik’s Cube was born.
The Astonishing Number of Combinations
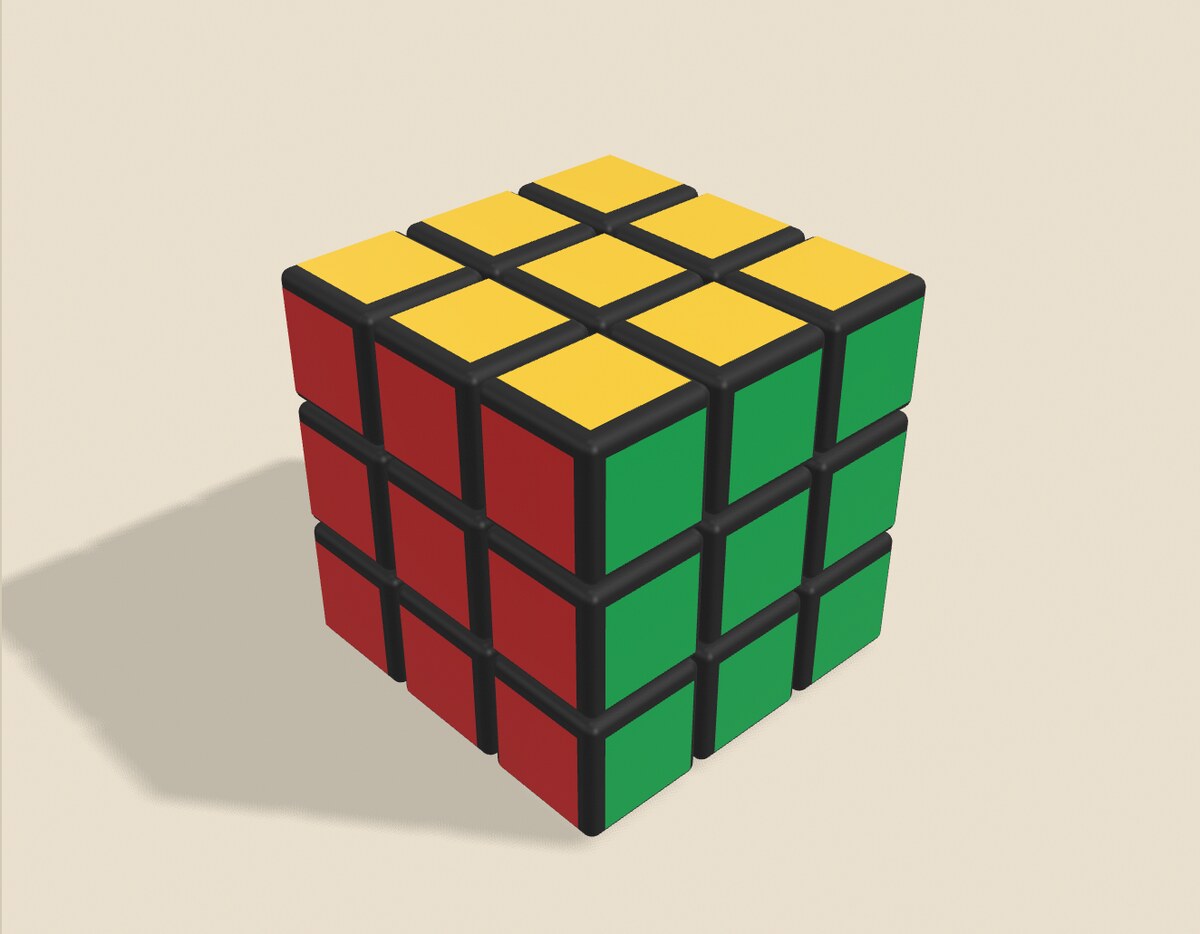
A standard 3x3 Rubik’s Cube consists of 8 corner pieces, 12 edge pieces, and 6 center pieces, totaling 26 visible parts. However, only 20 of these pieces can actually move (all except the 6 fixed center pieces).
So, how many possible states does it have? A staggering 4.3 × 10¹⁹.
To put that into perspective: this number of states is greater than the total number of grains of sand on Earth. If you tried 1 billion states per second, it would still take over 1300 years to cycle through them all. And if you wrote each possible state on a piece of paper and stacked them up, the pile would stretch from Earth to the Sun and back 14,000 times.
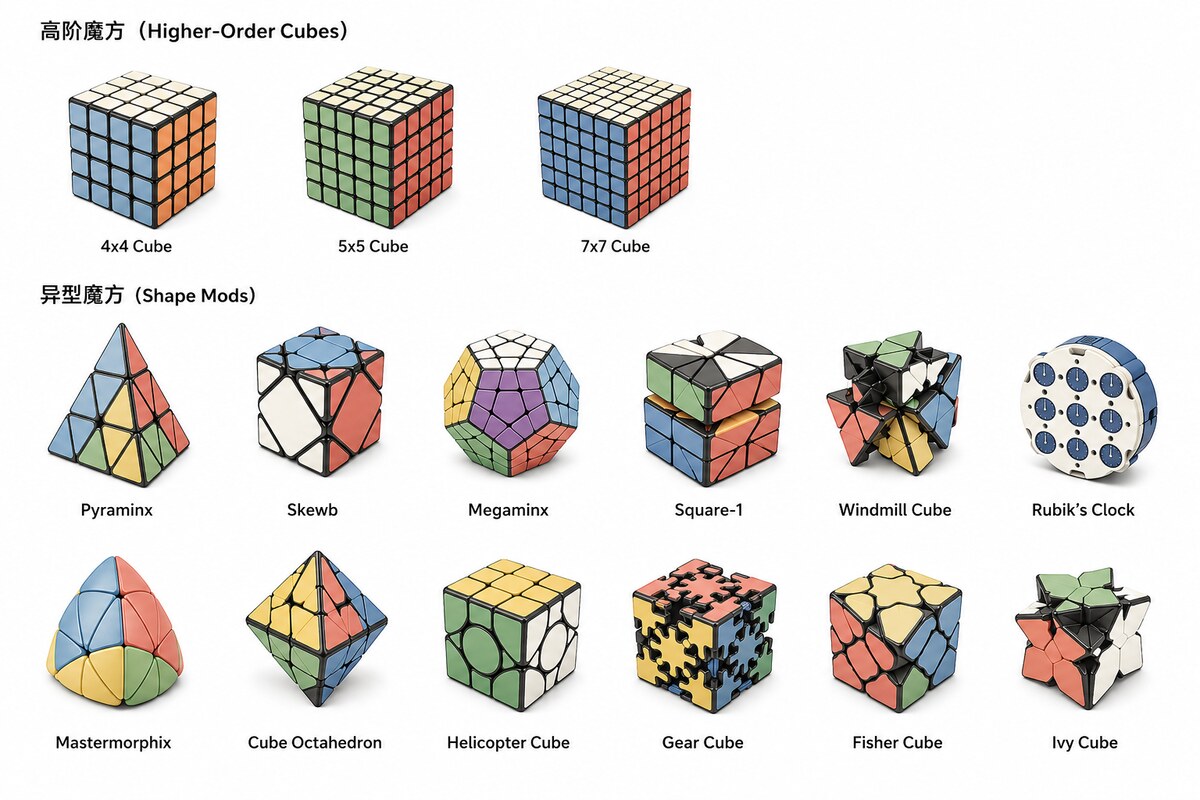
This humble 3x3 cube truly defies expectations. Its novel and engaging gameplay, combined with an endless array of variations, instantly captivated the market upon its release, drawing in enthusiasts from all walks of life. Soon, Rubik’s Cube competitions emerged, alongside a proliferation of solving methods (Speedsolving, Blindfolded, One-Handed, With Feet) and techniques (Layer by Layer, Corners First, CFOP, Roux Bridge, Petrus, ZZ). The world of puzzle cubes expanded even further with diverse shape mods and larger cubes (from 2x2 to 7x7, Pyraminx, Skewb, Megaminx).
The cube’s immense allure has led mathematicians to dedicate decades to studying its underlying math, tirelessly searching for “God’s Number.” Astronauts have even taken it to space, and people of all ages and genders shine in various competitions. Yet, despite its widespread appeal, the number of actual solvers remains relatively small. My hope with this article is to teach everyone how to solve the cube and experience the joy this clever puzzle game brings.
The Algorithm Conundrum
Most mainstream solving methods demand that players memorize a multitude of algorithms, which can be incredibly daunting for newcomers. They often get bogged down by formulas before they even get a taste of the satisfaction that comes from solving the cube. The popular CFOP method, for example, involves over 100 algorithms, with beginners typically needing to learn dozens.
That’s why today I want to share a method that lets you enjoy solving the Rubik’s Cube without memorizing any algorithms. You’ll be able to restore the cube purely through observation and understanding.
The Mathematical Powerhouse: Group Theory
Question: How can we solve a Rubik’s Cube without memorizing a single algorithm?
This is where we unleash the mathematical powerhouse: Group Theory. There’s virtually no problem that math can’t help us solve.
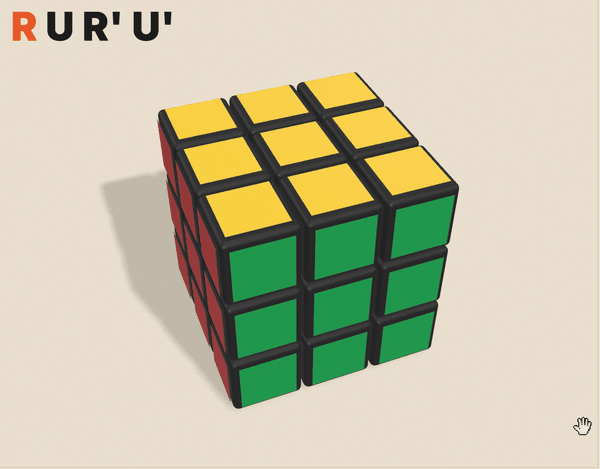
So, what’s the connection between the Rubik’s Cube and Group Theory? The cube itself is a group. Every turn on a Rubik’s Cube is a permutation operation. This operation has several key characteristics: it can be combined, it can be inverted, but it is not commutative.
Take multiplication, which we learned in elementary school; it’s a commutative operation, meaning A × B yields the exact same result as B × A. However, in the Rubik’s Cube group, swapping the order of operations A and B leads to different outcomes. Performing R then U is a completely different action than U then R. By understanding groups, we can understand the Rubik’s Cube. Conversely, playing with the cube also helps us grasp group theory.
Congratulations! You’ve just learned the distinction between an Abelian group (like multiplication and addition) and a non-Abelian group (like the Rubik’s Cube group).
(Addendum: A reader pointed out that the previous statement wasn’t entirely rigorous, so I’m adding a small note. Integers form an Abelian group under addition. Natural numbers (N) do not form an Abelian group under addition; for instance, 3 does not have an inverse -3, as -3 is not a natural number. Non-zero real numbers, non-zero rational numbers, and non-zero complex numbers all form Abelian groups under multiplication. The original analogy was primarily intended to help beginners grasp the core intuition of “commutative vs non-commutative.”)
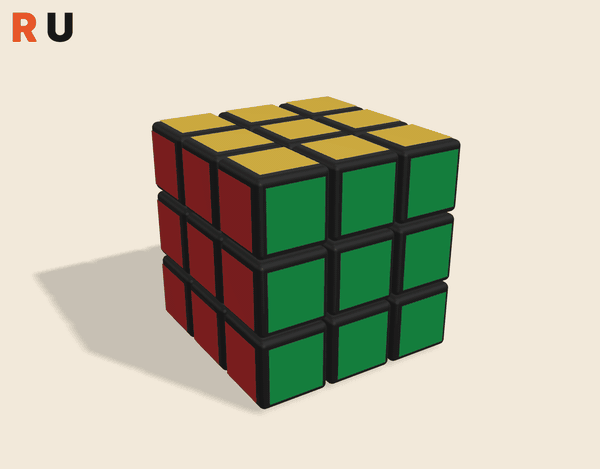

(Note: Standard Rubik’s Cube notation uses letters to represent moves. R means rotating the right face 90 degrees clockwise, U means rotating the top face 90 degrees clockwise, R’ means rotating 90 degrees counter-clockwise. M’ means moving the middle layer up, and M means moving it down.)
You can observe and learn how the cube turns directly using the online cube animation provided in the appendix.
Principle: The Core of Not Memorizing Algorithms: Commutators
To solve the Rubik’s Cube, we need to achieve a specific state: adjusting the positions of certain pieces without altering the positions of others.
In mathematics, this operation is called a commutator, written as A B A⁻¹ B⁻¹.
A⁻¹ denotes the inverse operation of A.
Let’s use a very relatable analogy: an elevator. Imagine you want to move a person from the 1st floor to the 3rd floor:
- A: The person walks into the elevator.
- B: The elevator goes up to the 3rd floor.
- A⁻¹: The person walks out of the elevator.
- B⁻¹: The elevator returns to the 1st floor.
Result: The elevator is back in its original position, but the person has moved from the 1st to the 3rd floor. The key is that when the elevator returned, the person was no longer inside – so the environment (the elevator) reverted, but the target (the person) changed position.
In the context of the Rubik’s Cube, for example, R and R⁻¹ correspond to rotating the right face 90 degrees clockwise and then 90 degrees counter-clockwise in the third step.
The inverse operation A⁻¹ B⁻¹ restores the environment that was disturbed by the A B operations. This allows us to exchange only specific pieces without affecting the surrounding areas.
Why not A A⁻¹ B B⁻¹? Because in that case, each action would immediately cancel itself out, preventing any piece exchange. Performing an action A, then immediately its inverse A⁻¹, amounts to doing nothing at all (e.g., turning the top layer 90 degrees counter-clockwise, then immediately 90 degrees clockwise). Therefore, it must be A B A⁻¹ B⁻¹ to achieve a swap.
This is the most fundamental exchange, and the most intuitive atomic move on the Rubik’s Cube is: R U R’ U’.
This sequence can be extended and combined to achieve various permutation effects, such as: (R U R’ U’) (R U R’ U’) (R U R’).
This, in essence, is the origin of algorithms. Why do algorithms exist? They simply combine a series of basic permutation operations into sequences. Executing these sequences allows you to quickly achieve specific results, like solving a particular edge or a corner piece. Different sequences can be combined to guide us toward the final solved state of the cube.
Once you grasp this principle, you can even construct your own custom algorithms. (How to create your own Rubik’s Cube algorithms will be thoroughly explained in a future post.)
So, to solve the Rubik’s Cube without memorizing a single algorithm, all we need to master is the fundamental concept of permutations. You can then apply this logic to any situation. The most atomic permutation moves will swap the positions of three corner pieces or three edge pieces.
How to Perform Exchanges on the Cube
As mentioned earlier, the most intuitive atomic exchange move on the Rubik’s Cube is R U R’ U’. A deep understanding of this move will immediately enable you to solve the first two layers of the cube.
This move essentially means: move aside (right layer), insert (target piece), restore (right layer), restore (top layer).
This allows us to insert a corner-edge pair from the top layer into an F2L slot, for instance.
This fundamental move can be varied endlessly, transforming into U R U’ R’, or F R F’ R’, and so on, for any position. You can even apply it to middle layers like M U M’ U’, or use double turns like U2 R U2 R’.
In the initial stages, the cube is at its most chaotic. Therefore, we can use many basic permutations like these to first solve one face or another localized section, thereby reducing the overall disorder.
Furthermore, because the cube is so scrambled, the final ‘restore environment’ move (U’) in R U R’ U’ can sometimes be omitted, depending on the situation, allowing you to directly transition to the next action. This simplifies the sequence to: move aside, insert, restore.
Move aside, insert, restore.
This is the core action. Congratulations, you now understand the essence of solving the Rubik’s Cube!
However, in later stages, we’ll need longer permutation sequences to swap specific blocks without completely undoing the already solved parts.
Take R U’ L’ U R’ U’ L U as an example. This move can swap three corner pieces without affecting anything else. Let’s break it down into commutator logic:
A   = R U'   (Moves a corner piece out of the way)
B   = L'     (Moves the left layer)
A⁻¹ = U R'   (Reverses operation A)
B⁻¹ = U' L U (Reverses operation B, with adjustment)
Effect: The bottom-left corner piece remains in place, while the other three corner pieces swap positions.
This is probably one of only two “algorithms” you’ll need to understand in this article. We’ll learn how to use it in the practical section, grasping it through observation and practice rather than rote memorization.
Practical Section: Solving from Scratch
Now, we arrive at the main event of this article! I’ll guide you step-by-step, using only observation and understanding, to completely solve a Rubik’s Cube from scratch.
Here’s what you’ll need:
- A Rubik’s Cube
- And a little patience (because our focus is on observation and understanding)
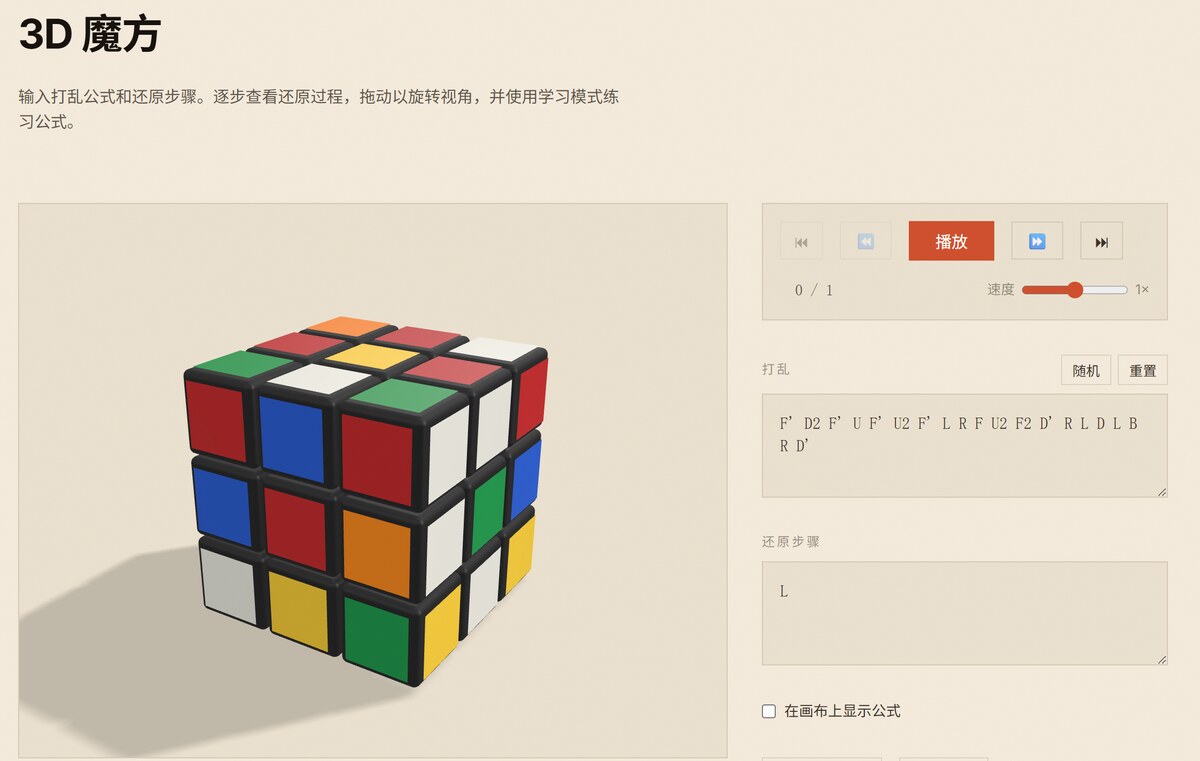
First, assume you have a Rubik’s Cube in hand. We’ll use the international standard scramble (F’ D2 F’ U F’ U2 F’ L R F U2 F2 D’ R L D L B R D’), and then I’ll guide you through solving it together.
Alternatively, you can play the online version directly. Clicking this link will show you a pre-scrambled cube: 3D Rubik’s Cube — Philo Li
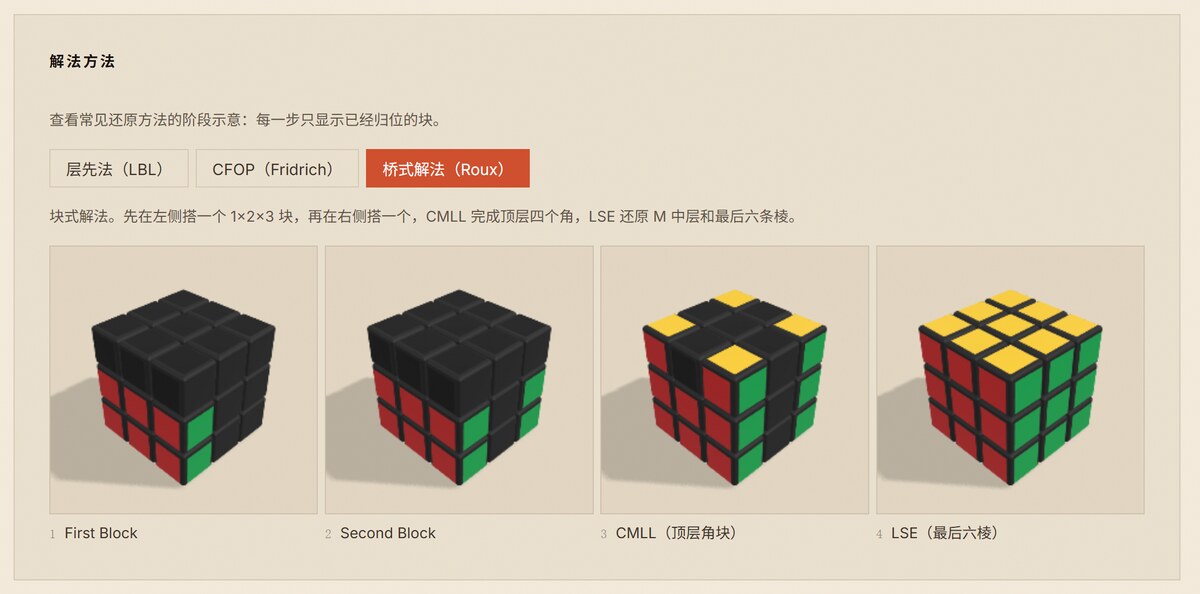
We can solve the cube using the elegant approach of the Roux bridge method. Unlike layer-by-layer methods, the bridge method focuses on first building 1x2x3 blocks on the left and right sides (known as the ‘bridges’), then solving the top layer and remaining pieces.
The Roux method is incredibly free and flexible, often requiring fewer moves than many well-known methods. It also demands very little algorithm memorization, as it’s primarily based on commutator logic. Within this framework, we’ll learn how to solve the cube without memorizing a single algorithm.
Step One: Fix Your Viewing Position
The Roux method uses a fixed viewing position. Throughout the solve, we won’t need to constantly reorient the cube; instead, we’ll maintain the same perspective for thinking and solving. By sticking to this fixed orientation, we can easily spot corner and edge pieces and understand where they need to go.
We can use this orientation as our standard:
- Front (facing you): Green face
- Left: Red
- Right: Orange
- Top: Yellow
- Bottom: White
- Back: Blue
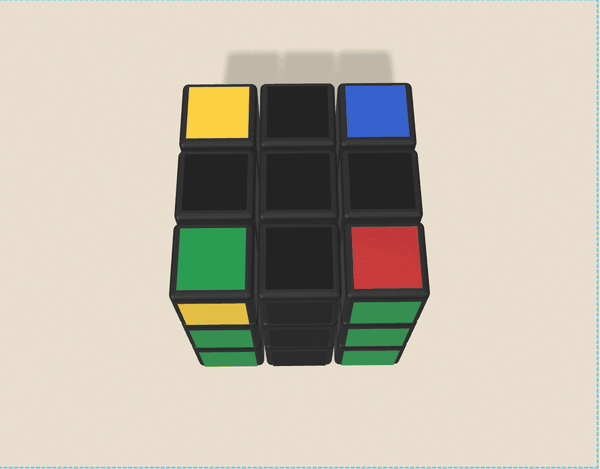
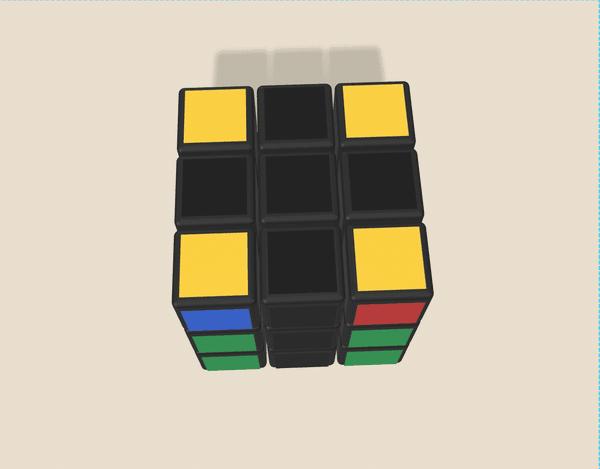
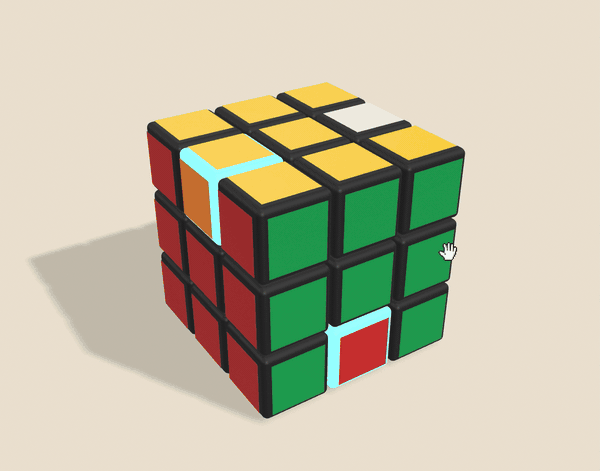
Step Two: Build the Side Bridges
Left Bridge Construction Order:
- First, position the white-red edge piece (the bottom-left pillar).
- Next, place the back blue-red edge piece.
- Finally, position the two front red corner pieces.
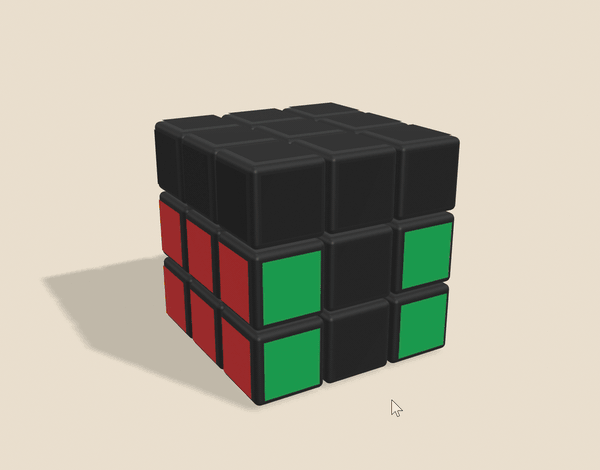
Left bridge completed state diagram:
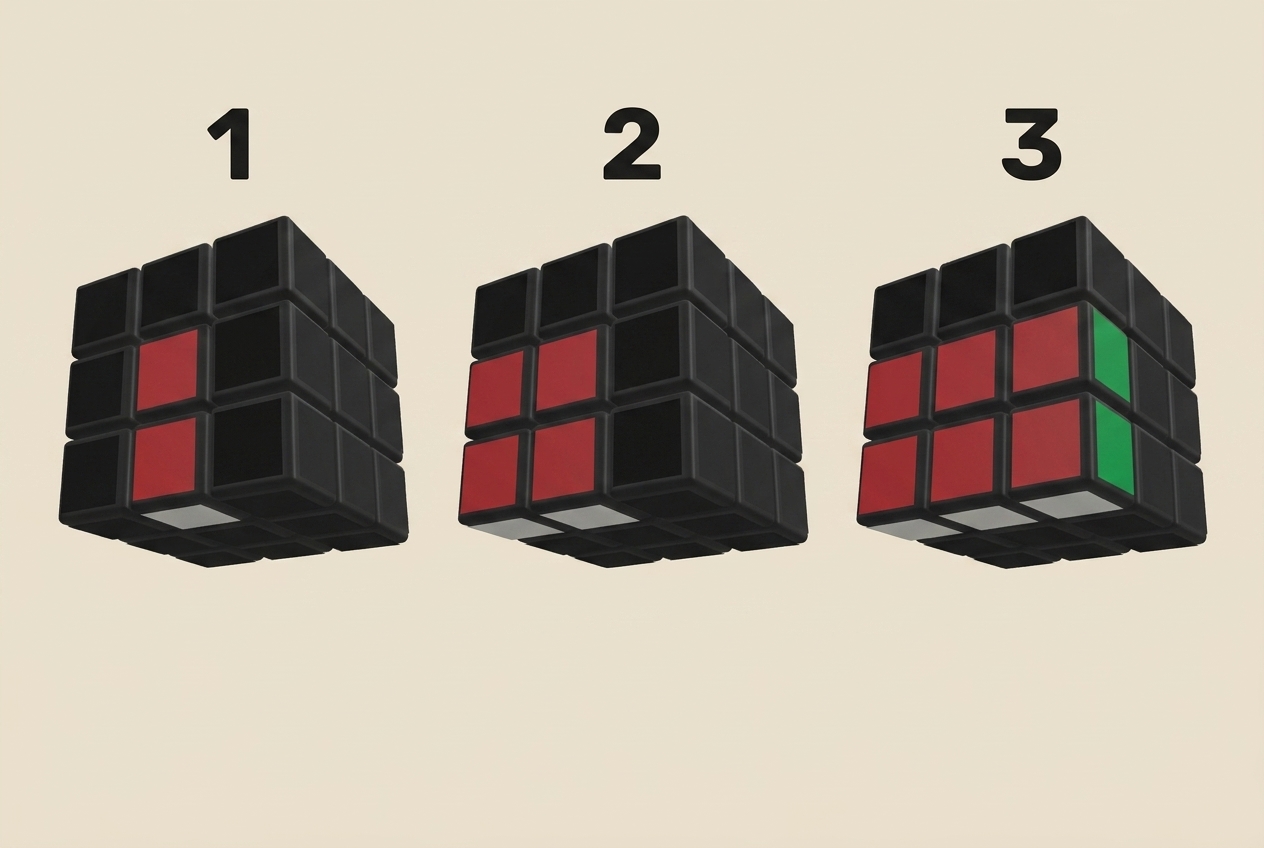
This entire process requires no algorithms—just observation and understanding. With practice, you’ll become increasingly proficient.
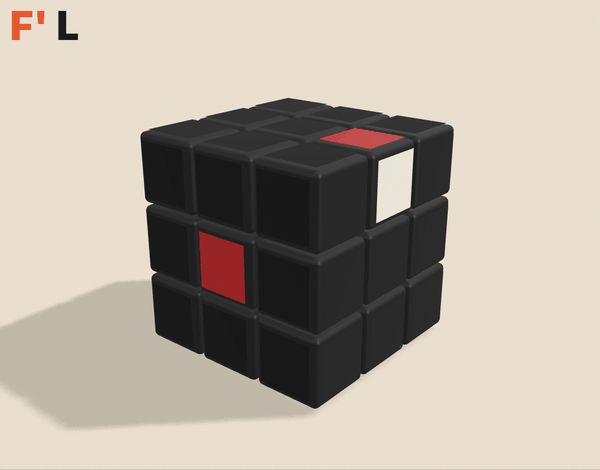
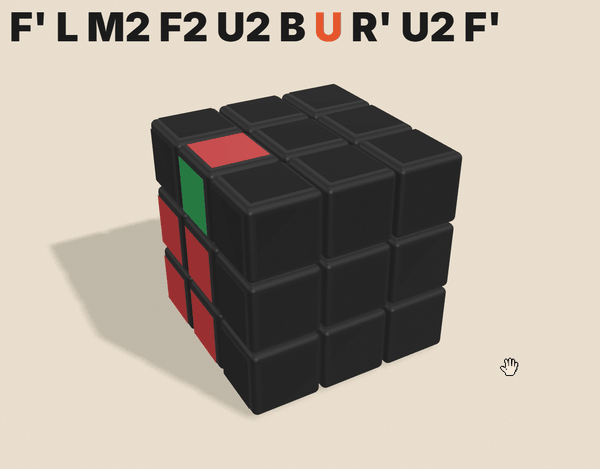
F’ L: Using observation, find the white-red edge piece and position it so white is on the bottom and red is on the left.
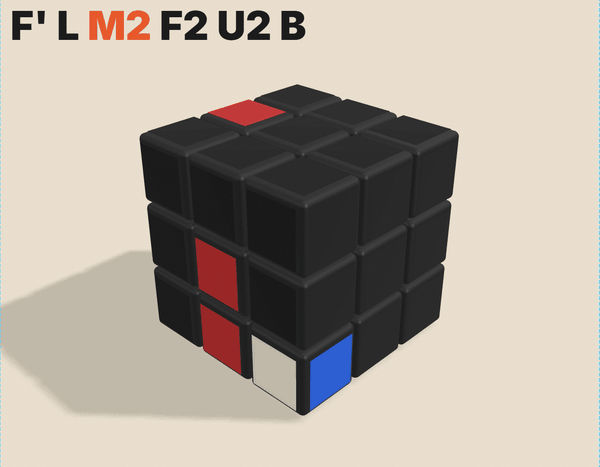
M2 F2 U2 B: Position the blue-red edge piece and corner pieces.
U2 B U R’ U2 F’: Locate the final two pieces for the left bridge, figure out how to place them, and thus complete a perfect left bridge.
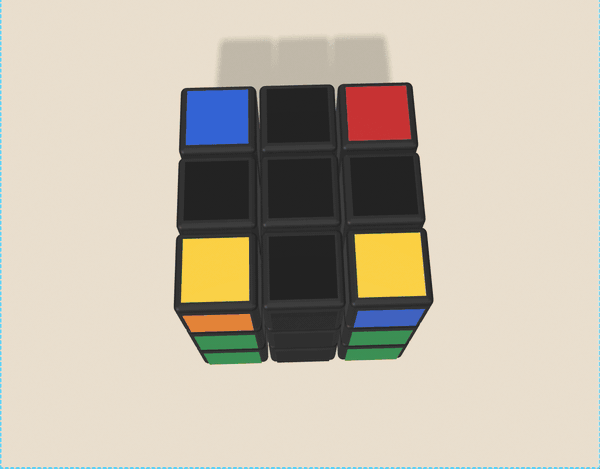
The right bridge follows the same logic: simply replace red with orange and repeat the steps. However, be careful not to scramble the left bridge you’ve already built. If you need to temporarily move pieces, shift the left bridge out of the way first so your right-side operations don’t affect it, then restore the left bridge once the right-side moves are complete.
Right bridge middle: U’ M U’ R2
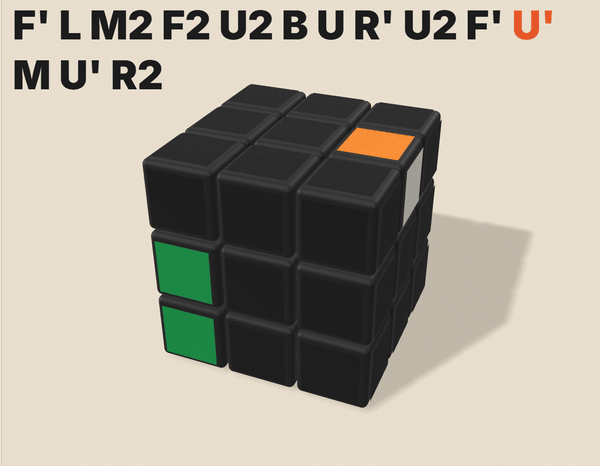
Right bridge first piece: U’ M’ U2 R’ U R
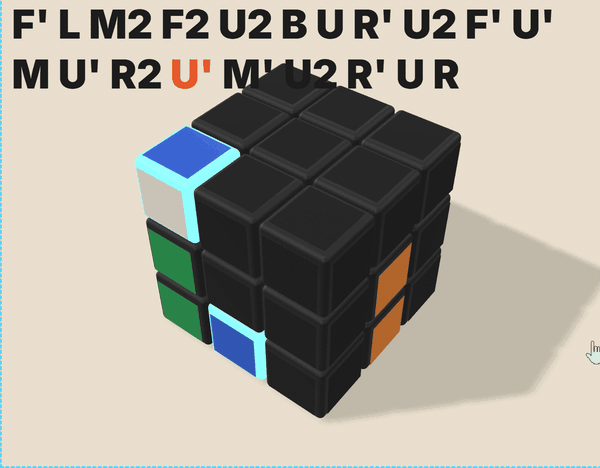
Having prepared the last module for the right bridge and wanting to insert it, we first move the left bridge out of the way (F’) to create space, then move the module (U), and finally restore both the left and right bridges simultaneously.
This is the state with both bridges complete. As long as the bridges are formed, don’t worry about the other colors for now.
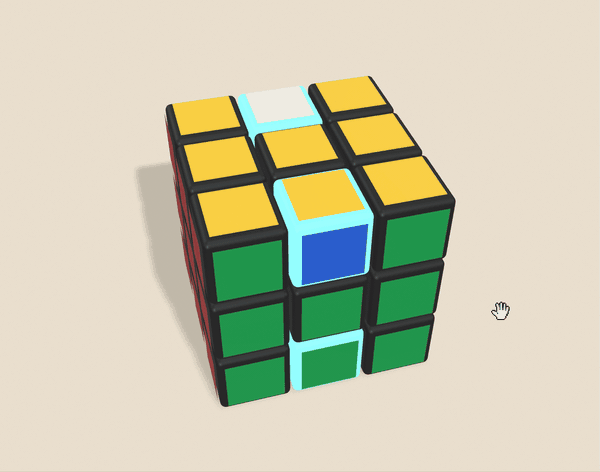
Step Three: Solve the Top Layer Corners
Once you’ve completed both side bridges, the next step is to solve the remaining four corner pieces. Here, we’ll use a corner 3-cycle, which rotates three corners from position A to B, B to C, and C back to A.
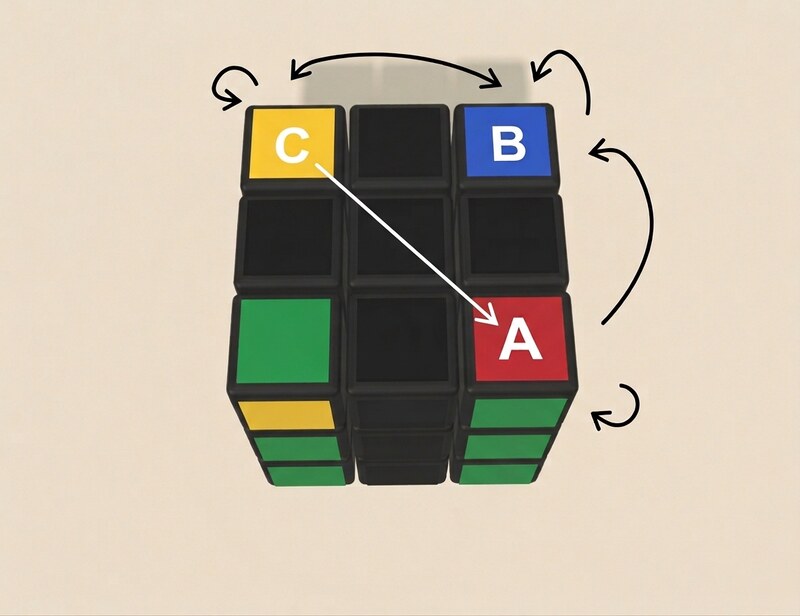
Corner 3-Cycle
Algorithm 1
R U' L' U R' U' L U
- The bottom-left corner piece remains stationary.
- The other three corner pieces swap positions counter-clockwise.
- However, their internal colors rotate clockwise.
Algorithm 2 (Mirrored Version)
L' U R U' L U R' U'
- The bottom-right corner piece remains stationary.
- The other three corner pieces swap positions clockwise.
- However, their internal colors rotate counter-clockwise.
You’ll only encounter four types of corner orientations: 0, 1, 2, or 4 ‘good’ corners.
- 4 good corners: Solved state.
- 1 good corner (Fish shape): Perform another 3-cycle or its mirrored version to complete it.
- 0 / 2 good corners: First, move a ‘bad’ corner to the position unaffected by the 3-cycle (bottom-left corner). Perform one 3-cycle, which will result in 1 good corner, returning to the previous situation.
Sometimes, the basic 3-cycle version needs to be performed twice for a complete solve, while the mirrored version might only take one. For beginners, just master the basic version, focusing on observation and understanding, and you’ll soon grasp the concept. This yellow-up 3-cycle is also a well-known classic algorithm, often called the ‘left/right fish’ algorithm; try to recognize the ‘fish’ pattern.
You don’t need to memorize this algorithm either. Just observe how the two green pieces move, and after a few hands-on attempts, you’ll become familiar with it. The core idea is to swap three corner pieces on the top layer.
Looking at our cube after completing the left and right bridges, we see two yellow pieces on top. So, we’ll move a non-yellow piece to the bottom-left corner and perform one corner 3-cycle. Then, either two more 3-cycles or one mirrored 3-cycle will orient all four top-layer corners with yellow facing up.
All four yellow corners are solved!
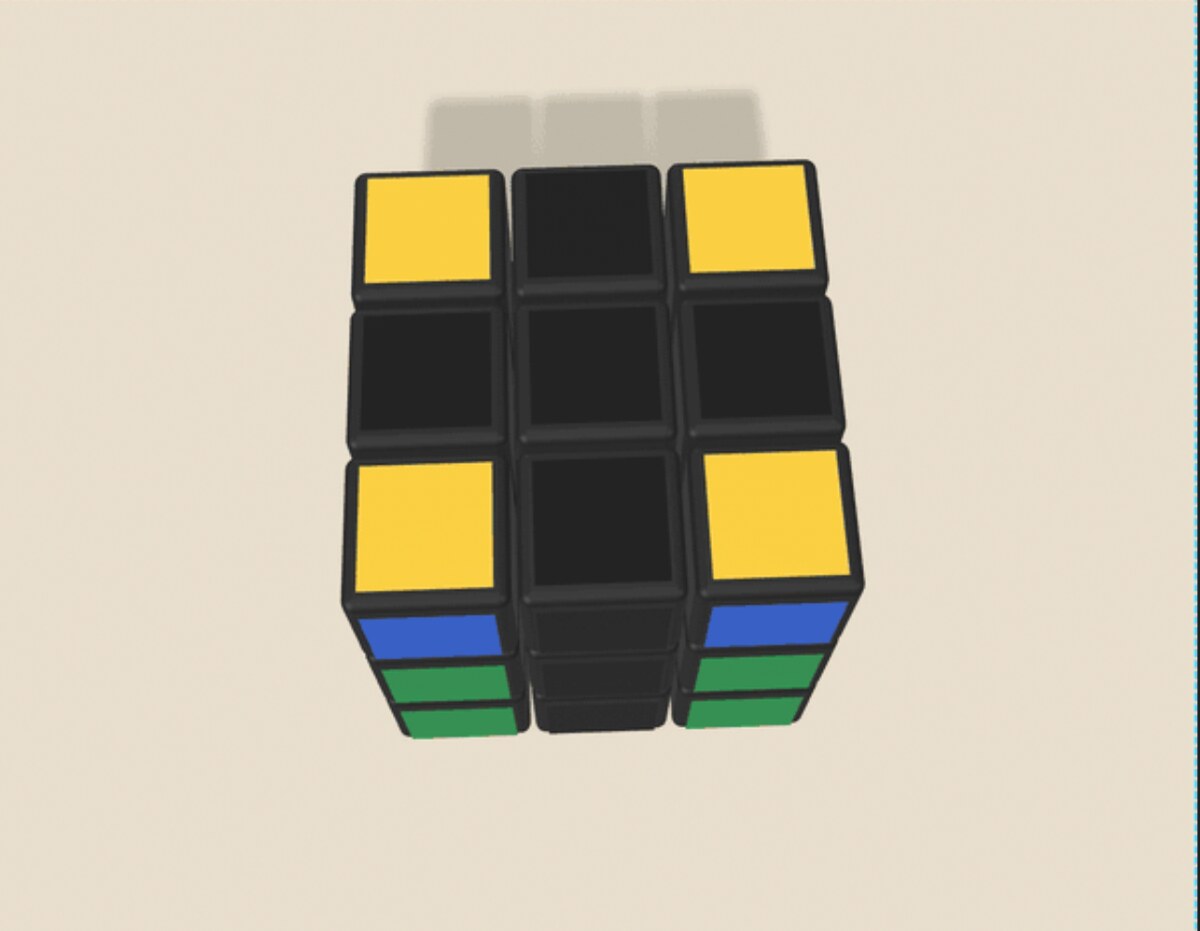
Adjusting Positions (Aligning Side Colors)
Once all four corner pieces have yellow facing up, you still need to align their side colors for them to be completely solved.
At this point, we’ll use a J-perm variant: R U2 R’ U’ R U2 L’ U R’ U’ L.
The logic of this algorithm can be broken down into “carrying a pair + logical swap”:
- First half
R U2 R' U' R: Moves a pair of pieces to a “safe zone” for temporary storage, creating space. - Second half
U2 L' U R' U' L: Uses 3-cycle logic to precisely swap two corner pieces.
Effect: The two corner pieces on the right swap positions, while keeping their yellow faces oriented upwards. Other corner pieces remain unchanged.
This means you can swap any two adjacent corner pieces (use U to position which two corners are on the right). By repeating this swap a few times, all four corner pieces will be perfectly aligned and solved.
You don’t need to memorize this algorithm either. Just observe how the two green pieces move, and after a few hands-on attempts, you’ll become familiar with it. The core idea is to swap the two rightmost corner pieces on the top layer while keeping yellow oriented upwards.
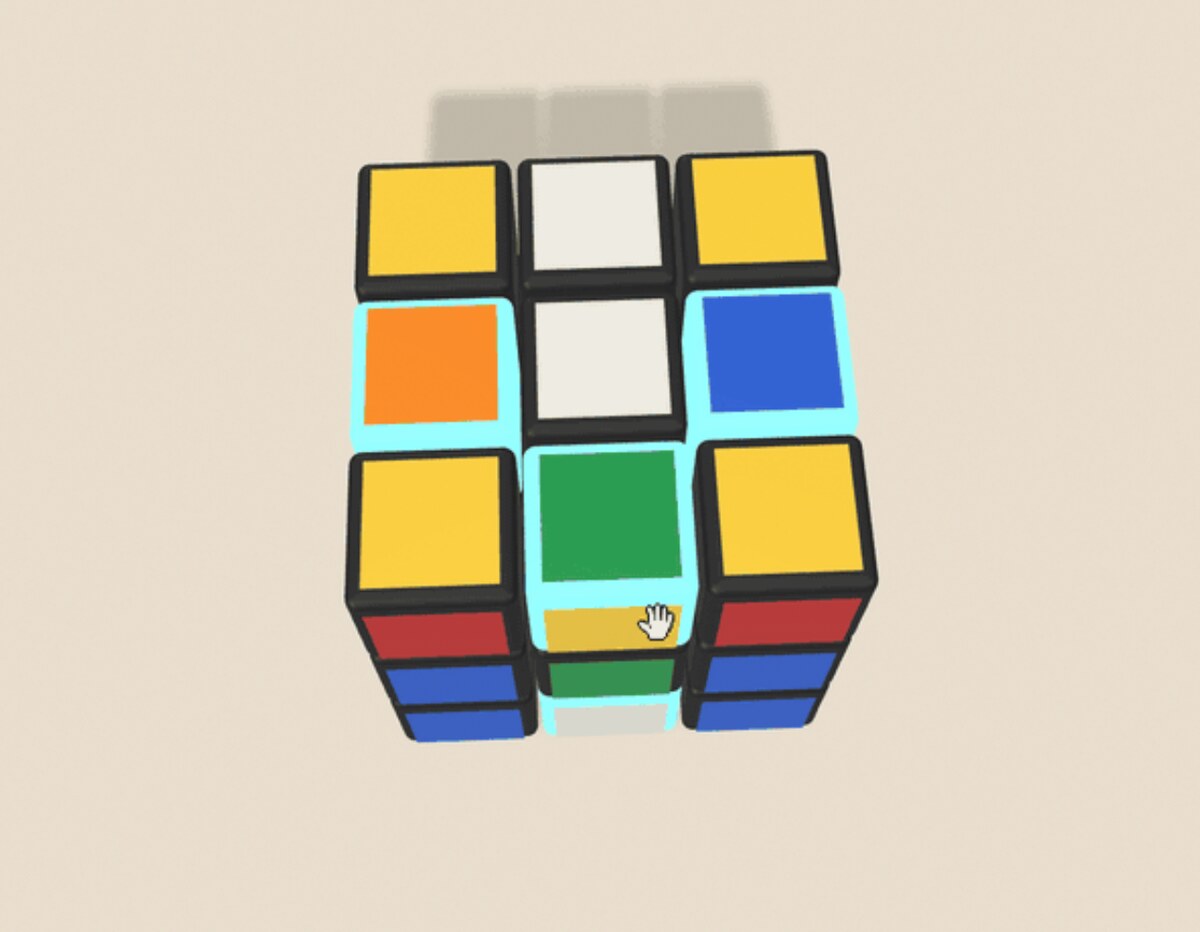
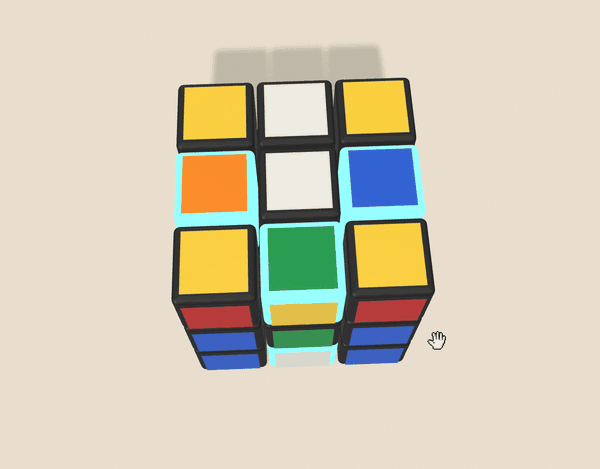
Step Four: Solve the Last Six Edges (LSE)
At this point, first align the center pieces so yellow is on top and white is on the bottom, then proceed to adjust the edge pieces.
Only 6 edge pieces remain. This step is highly intuitive, using only M and U moves.
4a: Adjust Orientation (EO, Edge Orientation)
How to identify: Check if the white/yellow sticker on the edge piece is facing up or down.
- Facing up / down = Good edge ✓
- Facing sideways = Bad edge ✗
How to adjust: Use M U M’ or M’ U M to flip the bad edge.
Intuitive understanding: M brings a middle-layer edge up, U adjusts its position, and M’ brings it back down.
Repeat a few times until all edge pieces have their white/yellow side facing either up or down.
We can call correctly oriented edges “good edges” and incorrectly oriented ones “bad edges.”
As highlighted in the image, the three top-layer edges are “bad” because they are neither yellow nor white.
Adjustment Tips: You’ll only encounter four types of “bad edge” scenarios:
- 0 bad edges: Solved state.
- Not 0 or 4 bad edges: Use M’ U M to change the number of bad edges, aiming to get 4 bad edges.
- 4 bad edges (2 on top, 2 on bottom): Use M’ U2 M to swap top and bottom edges, resulting in a 3 top, 1 bottom configuration.
- 4 bad edges (3 on top, 1 on bottom): The three bad edges on the top layer will form an arrow. Rotate the top layer so the arrow points towards the single bad edge on the bottom layer. Perform M’ U M once, and all four bad edges will cancel out, becoming good edges.
If an arrow doesn’t appear, keep trying M’ U M; you’ll eventually get it. As you advance, you can start looking for patterns.
4b: Solve the Side Edges (Red and Orange)
Locate the red-yellow and orange-yellow edge pieces (aiming for them to return to the left and right side edges). Use an edge 3-cycle to move them to their correct positions.
Tip:
- Move the red-yellow (or orange-yellow) piece to the top of the middle layer, then sink it to the bottom by swapping top and bottom edges (M’ U2 M).
- Sink the other orange-yellow (or red-yellow) piece on the opposite side.
- Rotate the top layer so the red side appears opposite the sunken red-yellow edge piece.
- Turn the middle layer half a turn (M2), then observe and align the top layer (U).
4c: Solve the Last Four Edges (Blue and Green)
Tips:
- Continuously use the edge 3-cycle to swap top and bottom edges: M’ U2 M. The final step is to align by observation using U2.
- Quick tip: Place the white-green (or white-blue) edge piece above its target position, swap top and bottom edges, and the white-green (or white-blue) piece will be solved.
There are only three scenarios:
- Already correct → Solved!
- Needs M2 → Perform M2 once.
- Needs a swap → M’ U2 M U2 or M U2 M’ U2.
We can also simplify the logic of the 3-edge cycle: M’ brings the middle layer up, U2 turns the top layer halfway, M restores the middle layer, and U2 restores the top layer.
Done!
Summary
No need for rote memorization of algorithms, just the “open-operate-close” commutator logic. You’ll find this process far more engaging than simply memorizing, and you won’t have to worry about forgetting it years down the line, as you can always re-derive it yourself.
This same line of thinking can be applied to solve any Rubik’s Cube, including all sorts of weird and wonderful shape mods.
However, if you aspire to competitive speedcubing, that path demands endless rigorous practice. But for beginners, achieving a solve under 90 seconds with a little practice should be well within reach.
There are countless solving methods out there; see if you can discover an even more elegant or intuitive approach that works for you.
The world of Rubik’s Cubes offers endless fun. Happy cubing!
Appendix 1: Rubik’s Cube Solving Cheat Sheet (Cube-Solving Mantra)
- Build the Side Bridges: Rely on Observation and Intuition
- Tips: Once you’re highly proficient at observation and anticipation, you can prioritize building other modules or even both bridges simultaneously based on the cube’s specific state. This allows for fewer moves and offers great flexibility.
- Orient the Top Layer Corners: All Four Yellow Faces Up
- Top layer corner 3-cycle: R U’ L’ U R’ U’ L U (Keeps the bottom-left corner piece stationary; the internal colors of the other three corner pieces rotate clockwise.)
- Top layer corner 3-cycle mirrored version: L’ U R U’ L U R’ U’ (Keeps the bottom-right corner piece stationary; the internal colors of the other three corner pieces rotate counter-clockwise.)
- Solve the Side Faces of the Top Layer Corners
- Top layer corner position fine-tuning: R U2 R’ U’ R U2 L’ U R’ U’ L (Keeps all four corner pieces with yellow facing up; swaps the positions of the two right-hand corner pieces.)
- Orient the Edge Pieces: White or Yellow Facing Up/Down
- First, align the center pieces so yellow is on top and white is on the bottom, then adjust the edge pieces.
- Use M’ U M to change the number of ‘bad’ edges. Form an arrow, point it towards a bad edge, perform M’ U M once, and all four bad edges will cancel out and be oriented correctly.
- Solve the Side Edges (Red and Orange)
- First, move the red-yellow (or orange-yellow) piece to the bottom by swapping top and bottom edges (M’ U2 M).
- Solve the Remaining Edges (Blue and Green)
- Continuously use the edge 3-cycle to swap top and bottom edges: M’ U2 M. The final step is to align by observation using U2.
You don’t need to memorize any of the algorithms above; they’re included in the appendix merely for easy reference. In practice, as you try them yourself, observing and understanding how the corresponding pieces move, you’ll become familiar with them after a few attempts. The core idea is always about swapping three top-layer corner pieces.
Appendix 2: Useful Websites and Tools
I’ve also created an online 3D Rubik’s Cube for you to play with! You can turn it freely, scramble it with a fixed algorithm, or solve it, and every step comes with beautiful animations!
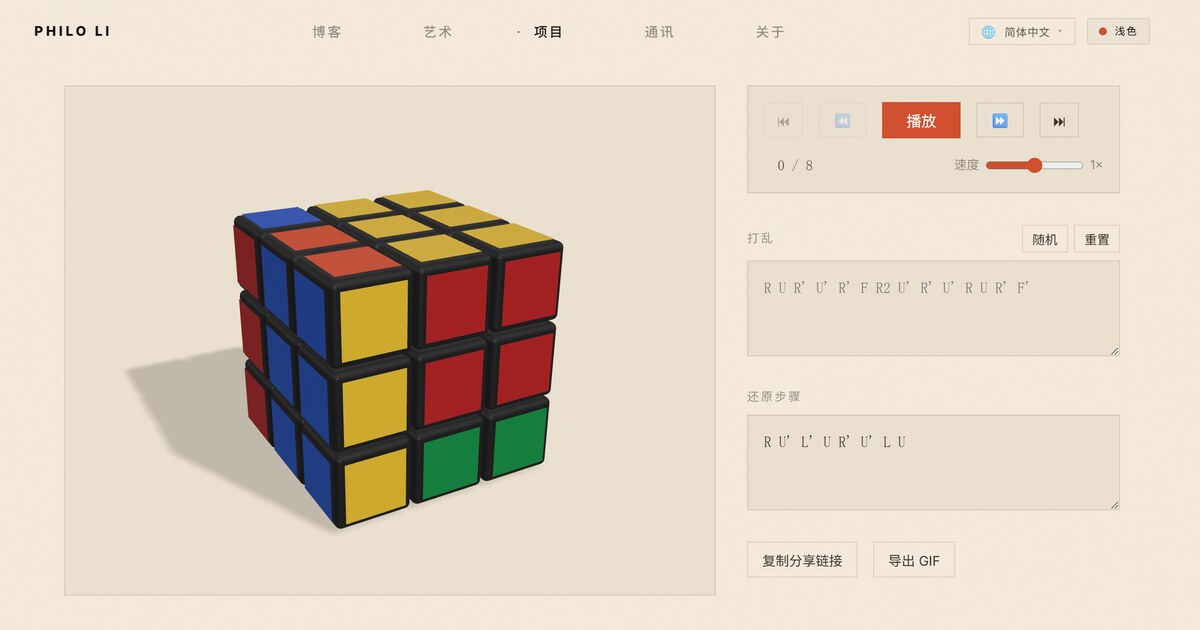
The same scramble algorithm used in this tutorial: F' D2 F' U F' U2 F' L R F U2 F2 D' R L D L B R D'
The left and right bridge solution steps for this tutorial: F'LM2F2U2BUR'U2F'UFR'F'U2MR'URUM'UR'U2RUF'UFU'M'UF'UF
Click this link to see the scrambled cube: 3D Rubik’s Cube — Philo Li
The Rubik’s Cube timer used by world champions: csTimer - Professional Rubik’s Cube Speedsolving / Training Timer